


Essential 6x8 Lean-To Shed Plans for Practical Outdoor Storage
This comprehensive guide details the essential plans for constructing a robust and practical 6x8 lean-to shed, ideal for various outdoor storage needs. The design prioritizes simplicity, functionality, and cost-effectiveness while adhering to sound building practices. This detailed outline provides a step-by-step approach, ensuring a successful project even for novice builders. Remember to always check local building codes and regulations before commencing any construction.
I. Planning and Design Considerations
Before initiating construction, meticulous planning is crucial. This phase involves several key considerations to ensure the shed meets your specific requirements and integrates seamlessly with your property.
A. Site Selection and Preparation
Choosing the right location is paramount. Consider factors such as proximity to existing structures, access for delivery of materials, sunlight exposure, drainage, and the overall aesthetic integration with the landscape. Ensure the chosen site is level and free of obstructions. This may involve excavating and compacting the ground, creating a stable foundation.
B. Material Selection
The choice of materials significantly influences the shed's durability, cost, and aesthetic appeal. Pressure-treated lumber is recommended for its resistance to rot and insect infestation, particularly for the foundation and framing. Consider using galvanized steel for roofing and fasteners to further enhance longevity. Other materials to consider include plywood for sheathing, roofing felt or shingles, and appropriate fasteners.
C. Design Specifications
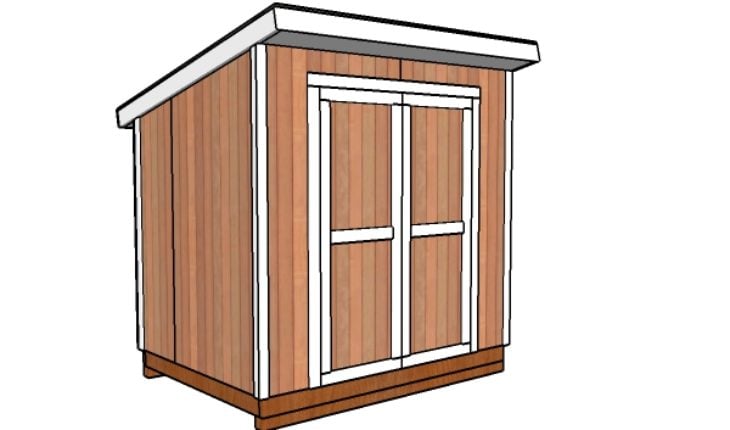
The 6x8 footprint offers a practical balance between storage capacity and footprint. The lean-to design, attached to an existing structure (like a house or garage), simplifies construction by eliminating the need for a complete wall on one side. Detailed plans should include precise measurements for all components, including the foundation, framing, roofing, and siding. Consider the height of the shed, ensuring sufficient headroom and convenient access.
II. Foundation Construction
A solid foundation is the cornerstone of a durable shed. The chosen foundation type depends on the soil conditions and the intended load-bearing capacity. For a 6x8 lean-to shed, a simple concrete slab or a gravel base with pressure-treated lumber sleepers are suitable options.
A. Concrete Slab Foundation
This option provides exceptional stability. It involves excavating to the required depth, installing a compacted gravel base, and pouring a reinforced concrete slab. Ensure proper leveling and curing before proceeding with the framing.
B. Gravel Base with Sleepers
A more economical approach involves creating a compacted gravel base and laying pressure-treated lumber sleepers on top. This provides sufficient support for the shed's framing. The sleepers should be spaced appropriately to accommodate the shed's framing members.
III. Framing and Construction
The framing provides the structural integrity of the shed. Precision is crucial to ensure the walls and roof are square and plumb. This section outlines the key framing steps.
A. Wall Framing
The framing will consist of vertical studs attached to the foundation and a top plate. The studs should be spaced 16 inches on center, ensuring sufficient strength and support for the sheathing. Use appropriate fasteners to secure the studs to the foundation and top plate.
B. Roof Framing
The roof framing will depend on the chosen roof design. A simple gable roof is commonly used for lean-to sheds. This involves constructing rafters that connect the top plates of the walls to the ridge board. Ensure appropriate rafter spacing and secure connections to prevent sagging.
C. Sheathing and Siding
Once the framing is complete, install plywood sheathing to the exterior walls and roof. This provides a surface for the siding and roofing materials. Select high-quality plywood that's properly treated for exterior use. After the sheathing, apply the chosen siding material, ensuring proper overlap and sealing of any gaps.
IV. Roofing Installation
Proper roofing installation is vital to protect the shed's contents from the elements. The chosen roofing material should be durable, weather-resistant, and aesthetically pleasing.
A. Underlayment
Before installing the roofing material, apply a layer of roofing underlayment. This waterproof barrier protects the shed from moisture penetration, enhancing the longevity of the roofing material.
B. Roofing Material Installation
Choose a roofing material that aligns with your budget and aesthetic preferences. Options include asphalt shingles, metal roofing, or even polycarbonate sheets. Follow the manufacturer's instructions for proper installation, ensuring proper overlapping and sealing to prevent leaks.
V. Finishing Touches and Considerations
After the main structural elements are complete, several finishing touches enhance the shed's functionality and aesthetics.
A. Door and Window Installation
Install a door for easy access to the shed's interior. Consider adding windows for natural light and ventilation, depending on your needs. Ensure proper sealing around doors and windows to prevent drafts and moisture penetration.
B. Interior Finishing
For added functionality, consider adding shelving or other storage solutions within the shed. Painting the interior walls can improve the aesthetic appeal and protect the wood from moisture.
C. Safety Considerations
Always prioritize safety during construction. Wear appropriate safety gear, including safety glasses, gloves, and hearing protection. Use caution when working with power tools and ensure proper stability of the structure during construction.
Following these essential 6x8 lean-to shed plans will guide you through the construction process. Remember to adjust these plans to your specific needs and preferences, always adhering to local building codes and safety regulations. With careful planning and execution, you can create a functional and durable outdoor storage solution that enhances your property.


No comments:
Post a Comment
Note: Only a member of this blog may post a comment.